



WhatsApp: +86 178 6574 8088

E-mail: jackyalum@163.com
English


WhatsApp: +86 178 6574 8088
E-mail: jackyalum@163.com
Related Products
Date: 18 Aug, 2026
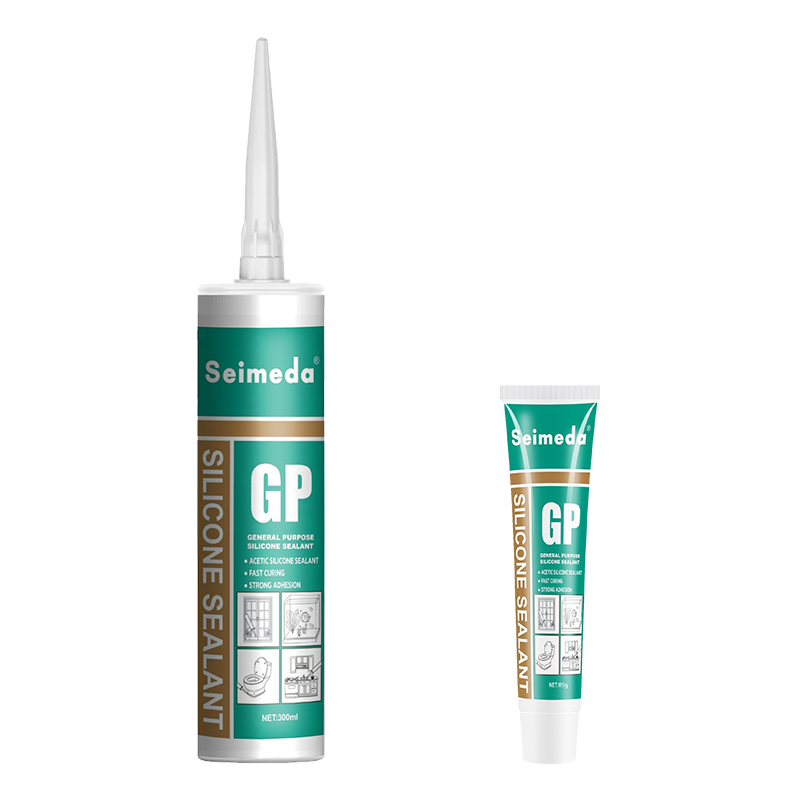
If old bathroom, kitchen, window, or glazing sealant has turned black, cracked, detached, or started leaking, I can help you solve the problem with a simple, controlled process: identify the failed joint, remove the old bead completely, prepare the substrate, apply Seimeda General Purpose Acetoxy Silicone Sealant, and inspect the finished joint. By following the steps below, you can replace old acetic silicone sealant efficiently while reducing rework, water ingress, mold growth, and unnecessary material waste.

The question How to Remove and Replace Old Acetic Silicone Sealant usually begins with a visible performance problem. Silicone sealant is an elastomeric joint material, but it does not last indefinitely. Exposure to ultraviolet radiation, moisture, cleaning chemicals, thermal cycling, and substrate movement can gradually reduce adhesion and elasticity.
Replace the sealant when you observe:
A new layer should not simply be applied over deteriorated silicone. Fresh silicone generally has limited adhesion to cured silicone, so the existing bead must be removed before applying General Purpose Acetoxy Silicone Sealant.
Before starting, prepare the tools and materials so the operation is continuous and controlled.
For professional installation, I also recommend a joint-depth gauge, moisture meter, and adhesion-test materials. Where dimensional control is important, record the joint width and depth to 0.01 mm. This is especially useful for repeatable commercial glazing, sanitaryware, and prefabricated assembly work.
Seimeda General Purpose Acetoxy Silicone Sealant is suitable for many general-purpose sealing applications where an acetoxy-curing silicone is compatible with the substrate and environmental conditions. Acetoxy silicone releases acetic acid during curing, which creates its characteristic vinegar-like odor.
Before ordering or applying the product, confirm:
Acetic silicone is commonly used on glass, glazed ceramic, and some non-porous surfaces. It may not be appropriate for natural stone, alkaline substrates, concrete, mortar, porous materials, copper, zinc, brass, or corrosion-sensitive metals. Always review the current Seimeda technical data sheet and conduct a small compatibility test.
The most reliable method for How to Remove and Replace Old Acetic Silicone Sealant is to divide the work into removal, preparation, application, and inspection.
First, determine whether the sealant is installed as a sanitary joint, perimeter seal, glazing seal, or movement joint. Confirm that the visible failure is actually caused by the sealant and not by:
Stop water use around the work area. If the joint is wet, postpone installation until the surface is completely dry. Applying silicone to a damp or contaminated substrate can cause adhesion failure.
Wear gloves and safety glasses. Using a sharp utility knife, cut along both sides of the old silicone bead where it contacts the substrate.
Keep the blade at a shallow angle to reduce scratching. On glass or glazed tile, work slowly and use a plastic scraper where possible. For a wide joint, make a second longitudinal cut through the center of the bead.
Do not force the blade into painted aluminum, acrylic, powder-coated profiles, or delicate fixtures. A damaged substrate can create a larger repair than the original sealant failure.
Grip one end of the cut bead with needle-nose pliers and pull it away from the joint. In many cases, long sections can be removed in one piece.
If the bead breaks:
This is the most important stage in How to Remove and Replace Old Acetic Silicone Sealant. Even small cured silicone residues can reduce the adhesion of the replacement bead.
Use a silicone removal tool or plastic scraper to eliminate thin residue. Avoid aggressive abrasion on polished stone, coated metal, acrylic, and finished wood.
For persistent contamination, use a sealant-removal product that is approved for the substrate. Follow its safety instructions and allow the surface to dry fully afterward. Do not assume that a solvent safe for glass is also safe for plastics, coatings, or painted surfaces.
Clean the joint with a compatible detergent solution, then remove all soap, dust, grease, mold residue, and loose particles.
A professional preparation sequence is:
Do not use oily cleaners, silicone polish, or household products that leave a residue. The surface should be clean, dry, stable, and free from dust.
If the substrate is cracked, loose, rotten, or structurally unstable, repair it before resealing. Silicone is a flexible sealant, not a substitute for structural repair.
For deep joints, install a compatible closed-cell backer rod. The backer rod controls sealant depth and prevents three-sided adhesion. A properly designed joint normally allows the sealant to stretch and compress more effectively as the adjoining materials move.
Avoid filling excessively deep cavities with silicone. Excess material can extend cure time and increase material consumption.
Apply masking tape along both sides of the joint. Keep the exposed width consistent so the finished bead has a uniform profile.
For commercial or repeated installations, establish a standard joint dimension and document it. A controlled bead width is easier to inspect and provides more consistent performance than an irregular hand-applied joint.
Cut the cartridge nozzle at approximately a 45-degree angle, matching the opening to the joint width. Load the cartridge into the caulking gun and test the flow on scrap material.
Apply Seimeda General Purpose Acetoxy Silicone Sealant in one continuous movement whenever possible. Maintain steady pressure on the trigger and keep the nozzle in contact with both sides of the joint.
For a clean application:
Acetic silicone begins forming a skin after application, so tooling should be completed within the product’s stated tooling window. Always follow the Seimeda technical data sheet for application temperature, skin formation, and curing conditions.
Tool the sealant with a clean profiling tool or suitable smoothing implement. Apply even pressure to create a continuous concave or slightly crowned profile, depending on the joint design.
Remove masking tape while the sealant is still workable. Pull the tape away from the joint at a low angle, then dispose of it immediately.
Do not repeatedly touch the bead after skin formation. Excessive reworking can create surface defects, drag marks, or poor contact at the joint edges.
Keep the area dry, clean, and undisturbed during curing. Acetoxy silicone generally cures from the surface inward, so thicker sections require more time.
The actual cure rate depends on:
After curing, inspect the joint for:
For critical installations, perform an adhesion check on a test section or use a field adhesion procedure based on the sealant manufacturer’s recommendations. Product qualification may reference standards such as ASTM C920, while adhesion evaluation may use principles associated with ASTM C794. Tack-free or skin-formation testing can be considered against ASTM C679, where applicable. These standards should not be treated as automatic certification of every product; verify the exact Seimeda product documentation before making a compliance claim.
This usually results from:
The solution is to remove the bead completely, clean the joint again, conduct a compatibility test, and confirm that the selected sealant is suitable for the application.
Slow curing may be caused by a deep joint, low temperature, limited ventilation, or expired material. Check the cartridge batch information and storage conditions. Do not expose the joint to water or mechanical stress until it has cured according to the technical data sheet.
Mold may not be caused by the sealant alone. Persistent moisture, poor ventilation, leaking plumbing, and dirty joint edges can allow mold to return.
Correct the moisture source first. Then remove the old sealant, clean the substrate, dry it completely, and apply a new compatible bead. A sealant marketed for general purpose use should not automatically be considered a substitute for a specialty sanitary or mold-resistant formulation.
Uneven application usually comes from inconsistent gun pressure, an incorrectly cut nozzle, or an unstable hand position. Practice on a sample joint, cut the nozzle to match the required width, and tool the bead in one controlled pass.
For maintenance teams, distributors, installers, and construction businesses, a documented process reduces callbacks and improves customer confidence.
| Checkpoint | Recommended control |
|---|---|
| Existing sealant | Remove 100% of visible cured silicone |
| Joint dimensions | Record width and depth; use measurements to 0.01 mm where required |
| Substrate | Confirm clean, dry, stable, and compatible |
| Product | Verify batch, shelf life, color, and technical data sheet |
| Application | Apply a continuous bead with no visible voids |
| Inspection | Complete 100% visual inspection of the finished joint |
| Cure protection | Keep the joint undisturbed during the specified cure period |
| Documentation | Record installer, date, batch number, and location |
| Technical support | Request a response within 24 hours for urgent project questions, subject to Seimeda service terms |
For export projects, OEM production, and large-volume procurement, ask Seimeda for packaging specifications, technical documentation, application guidance, and batch-control information before shipment. This helps businesses standardize installation across multiple sites and reduce inconsistent workmanship.
To complete How to Remove and Replace Old Acetic Silicone Sealant correctly, remember the essential sequence: diagnose the leak, cut and remove the old bead, eliminate residue, clean and dry the substrate, repair the joint, mask the edges, apply Seimeda General Purpose Acetoxy Silicone Sealant, tool it within the working time, and complete a 100% visual inspection after curing.
When the substrate is compatible and the joint is properly prepared, Seimeda General Purpose Acetoxy Silicone Sealant can provide a practical solution for many general-purpose sealing applications. Before beginning, check the technical data sheet, test an inconspicuous area, and contact Seimeda for product-specific guidance. Taking these steps now can prevent repeat leakage, improve installation quality, and make your next sealant replacement faster and more reliable.